Assess Hour
A Solution for online assessment (SaaS)
- created: 08/21/2022
- latest update: 12/29/2022
- by: Sangib Kumar Saha
- email: sangibruse@gmail.com
Thank you for purchasing my script. If you have any questions that are beyond the scope of this help file, feel free to email me.
Overview
Assess Hour is a single page(SPA) web application / platform for online Assessments, tests, surveys, quizzes and exams. It's best suited for the online evaluations and skills assessment for the educational institutions, companies, corporations and agencies. You can start your own SaaS businees with Assess Hour, also your customers can earn money by selling their own assessments.
Server Requirements
For Windows Server with IIS & Mysql
- IIS 10
- .NET 6 hosting bundle (Browse here to download https://dotnet.microsoft.com/download/dotnet/6.0/runtime)
- URL Rewrite (Browse here to download https://www.iis.net/downloads/microsoft/url-rewrite)
- Mysql DB
For Linux Server with Nginx & Mysql
- sudo apt update
- sudo apt install nginx
- sudo apt-get install -y dotnet6
- sudo apt install mysql-server
Here is some resourses so that you can find more detail about above installations-
- https://www.digitalocean.com/community/tutorials/how-to-install-nginx-on-ubuntu-20-04
- https://docs.microsoft.com/en-us/dotnet/core/install/linux-ubuntu
- https://www.digitalocean.com/community/tutorials/how-to-install-mysql-on-ubuntu-20-04
Publish to Server
Windows Server
- Open Api project from Project folder.Here you will get a file named appsettings.json, open that then move to ConnectionStrings and change ApiConnStringMysql as per your Mysql DB.
-
Assuming you are going to use https://assesshour.com as Site name for Client. Now on appsettings.json file move to clientUrl and you can see https://assesshour.com set as clientLive.
-
Now open a new site on IIS with Site name, Physical path, IP address, Port and Host name. Copy the contents of Api project to the physical path which you created. Now assuming that you set the Host name as api.assesshour.com, copy that name and store somewhere because we need that name just a bit later.
-
Open Client project from Project folder. Here you will find a config.js file and set that name (api.assesshour.com) on hostname to config.js file.
export default{
    hostname:'https://api.assesshour.com'
}
Now you need to copy the contents of Client project to a physical path on server and open another site with Host name as assesshour.com.
- Now it's time to import the database file to your Mysql database. You will find a database on DB folder.That's all for windows server.
Linux(Ubuntu) Server
- Open Api project from Project folder.Here you will get a file named appsettings.json, open that then move to ConnectionStrings and change ApiConnStringMysql as per your Mysql DB.
-
Assuming you are going to use https://assesshour.com as Site name for Client. Now on appsettings.json file move to clientUrl and you can see https://assesshour.com set as clientLive.
- Now you will need to create a directory named AssessHour.Api on your Linux server. Execute below command on your linux terminal to create that directory then copy the contents of Api directory to this (/var/www/AssessHour.Api) path.
-> sudo mkdir /var/www/AssessHour.Api
Now it's time to configure nginx, open a config file,
-> sudo nano /etc/nginx/sites-available/assessHourApi
-> sudo ln -s /etc/nginx/sites-available/assessHourApi /etc/nginx/sites-enabled/assessHourApi
Place the below contents and save that file.
server {

    listen        80;
    server_name  api.assesshour.com;
    location / {
        proxy_pass         http://localhost:5003;
        proxy_http_version 1.1;
        proxy_set_header   Upgrade $http_upgrade;
        proxy_set_header   Connection keep-alive;
        proxy_set_header   Host $host;
        proxy_cache_bypass $http_upgrade;
        proxy_set_header   X-Forwarded-For $proxy_add_x_forwarded_for;
        proxy_set_header   X-Forwarded-Proto $scheme;
  }
}
          [Unit]
          Description=Api for AssessHour client App

          [Service]
          WorkingDirectory=/var/www/AssessHour.Api/publish
          ExecStart=/usr/bin/dotnet /var/www/AssessHour.Api/publish/QuizplusApi.dll
          Restart=always
          # Restart service after 10 seconds if the dotnet service crashes:
          RestartSec=10
          KillSignal=SIGINT
          SyslogIdentifier=AssessHour.Api
          User=ubuntu-user
          Environment=ASPNETCORE_ENVIRONMENT=Production
          Environment=DOTNET_PRINT_TELEMETRY_MESSAGE=false
          Environment=ASPNETCORE_URLS=http://localhost:5003

          [Install]
          WantedBy=multi-user.target
-
Now, Open Client project from Project folder and set that 'https://api.assesshour.com' on hostname to config.js file.
export default{
    hostname:'https://api.assesshour.com'
}
Now you will need to create a directory named AssessHour.Client on your Linux server. Execute below command on your linux terminal to create that directory then copy the contents of Client directory to this (/var/www/AssessHour.Client) path.
-> sudo mkdir /var/www/AssessHour.Client
Next, open a config file,
-> sudo nano /etc/nginx/sites-available/assessHourClient
-> sudo ln -s /etc/nginx/sites-available/assessHourClient /etc/nginx/sites-enabled/assessHourClient
Place the below contents and save that file.
server {
    listen      80;
    server_name assesshour.com;
    charset utf-8;
    root    /var/www/AssessHour.Client/dist;
    index   index.html;
    #Always serve index.html for any request
    location / {
        root /var/www/AssessHour.Client/dist;
        try_files $uri  /index.html;
    }
    error_log  /var/log/nginx/vue-app-error.log;
    access_log /var/log/nginx/vue-app-access.log;
}
- Now it's time to import the database file to your Mysql database. You will find a database on DB folder.That's all for windows server.
Credentials
For Super Admin, Username:superAdmin@assessHour.com Password:abcd1234
Payment Testing
- Email: Any valid email
- Card information : 4242 4242 4242 4242 (Visa card)
- MM/YY : Any future month and year
- CVC : Any 3 digit number
- Country or region : Any Country
To find more detail you can browse this link (https://stripe.com/docs/testing)
Database Options
This project currently configured with Mysql DB but you have more database options. You can use Sql Server, Postgresql, Oracle and Sqlite. If you want to use one of them, let me know i will help you for that with free of cost.
Features(Super Admin)
Super Admin user has below menus
- Dashboard
- Menus
- Roles
- Users
- Faq
- Contacts
- Payments
- Plans
- App Settings
we will discuss briefly each of the menus.
Dashboard
In Super Admin Dashboard, application status will show by different charts & data. Charts are based on different data like
- Payment (Date wise)
- Participation (Date wise)
- Participation (Assessment Topic wise)
- Browsing history (Month wise)
- Browsing history (Depends on browser)
- Browsing history (Operating system wise)
- Login (Date wise)

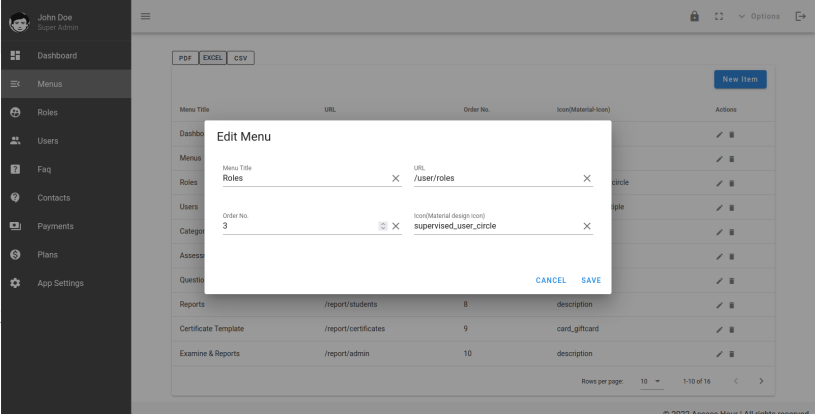
Menus
Here you find a list of all menus of this App. To add a new menu you have to fill below fields
- Menu Title (No duplicate Menu Title is accepted)
- URL (No duplicate URL is accepted)
- Order No. (No duplicate order no. is accepted)
- Icon (Only material design icon is allowed, browse this link to find more icons https://fonts.google.com/icons?selected=Material+Icons)
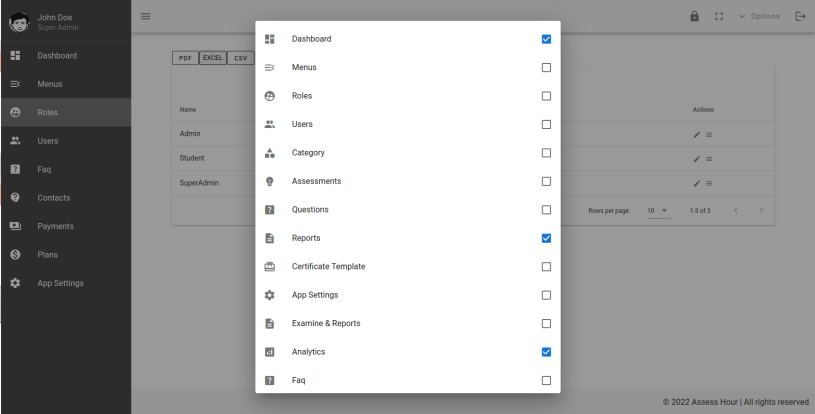
Roles
You will find three roles (Super Admin,Admin & Student) here. These roles are restricted to modify and delete because these are used for many configuration issues.
Anyway you can assign menus for a role from actions.
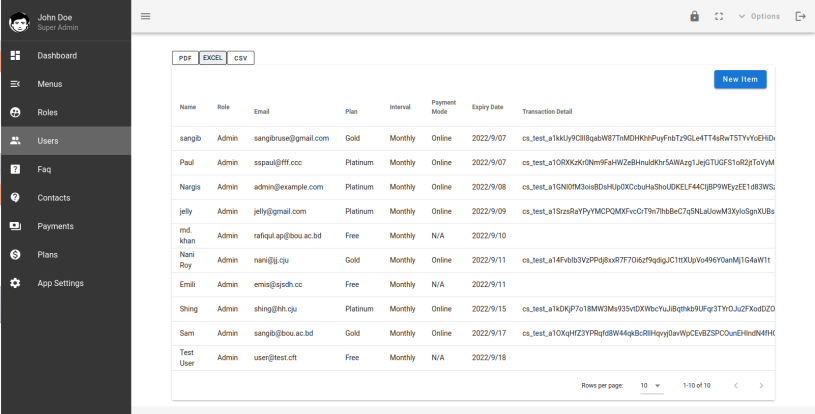
Users
You will find all admin users here with there transaction detail, plan, plan interval, payment mode & others. Also you can manage offline transactions from here. You can add new users from here with transaction details.
FAQ
All faqs are here. You can add new faq from here also can modify exting faqs. Those faqs will viewed by other roles users.

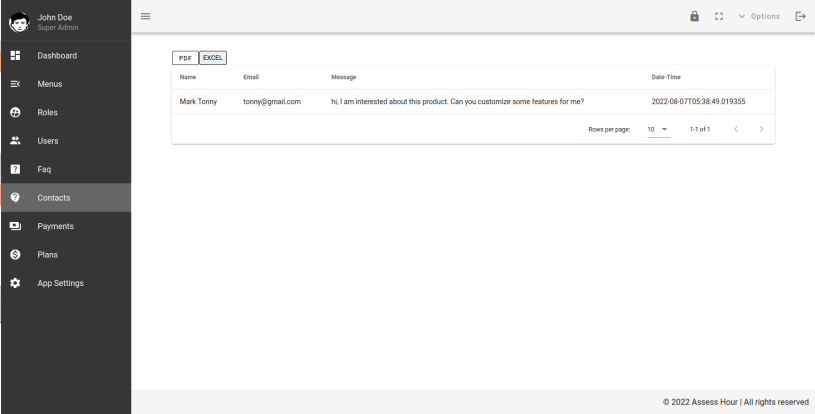
Contacts
All requests and queries which input come from landing page will be viewed here.
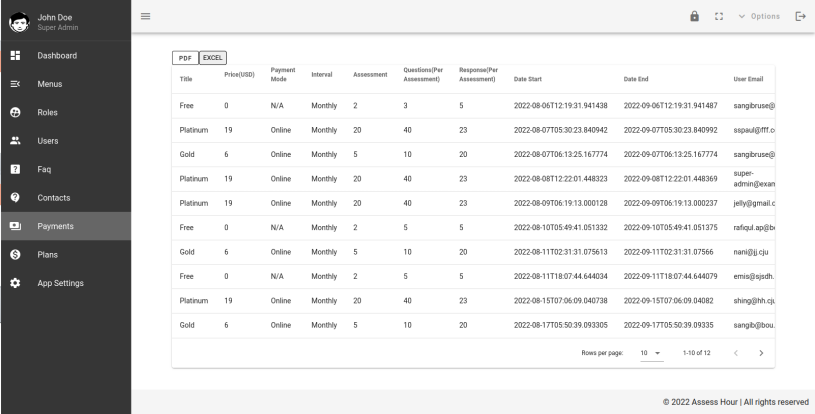
Payments
All transactions of admins are here. You can see all possible data which are generated by customers when they purchase any of your subscription plan.
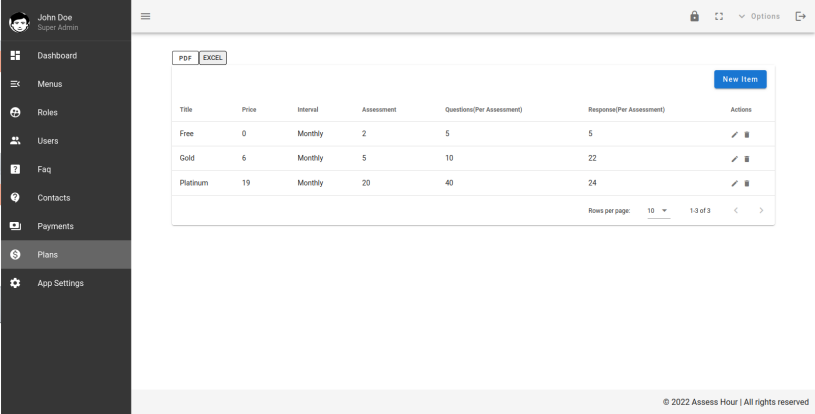
Plans
You can see all subscription plans from here, can modify, delete & add new one from here by filling below fields
- Title (Name of plan)
- Price (set price here, if you put 0 then that plan will be free)
- Interval (Monthly/Yearly)
- Allowed Assessment (Number of allowed assessment for that plan)
- Allowed Question (Number of allowed question for each assessment)
- Allowed Candidate (Number of candidate allowed to take each assessment)
- Additional Text ( Some text to view when your customer see that plan on landing page)
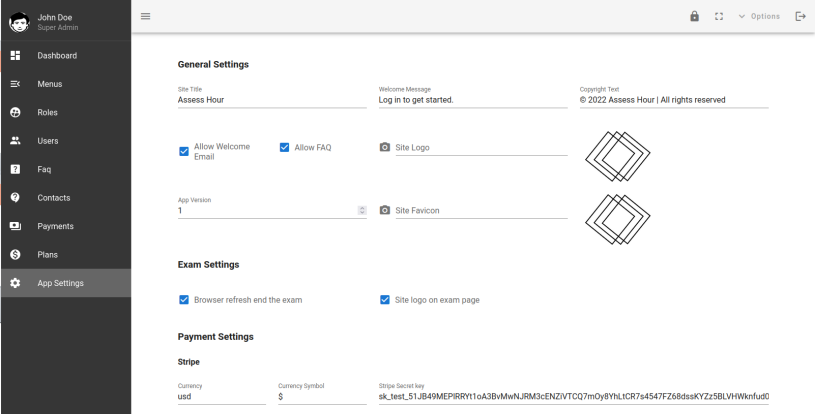
App Settings
Total app settings including site logo, site favicon, site title, welcome message, copyright text, allow welcome email, allow FAQ, Exam Settings, Payment Settings, Email Settings & Color controls.
- General Settings ( site logo, site favicon, site title, welcome message, copyright text, allow welcome email, allow FAQ, App version etc.)
- Exam Settings ( Browser refresh end the exam , site logo on exam page)
- Payment Settings ( you need to put your Stripe secret key here to take online payments)
- Email Settings
->For Gmail Port: 587 , Host: smtp.gmail.com
->For Yahoo Port: 587 , Host: smtp.mail.yahoo.com
->For Outlook Port: 587 , Host: smtp-mail.outlook.com
5. Color Settings ( Color controls for Menu Bar , Header, Footer & Body)
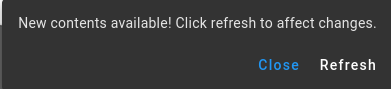
Keep in mind, if you change app version number then a pop up (like below image) will appear on dashboad which will instruct you to refresh. Change the app version only when you do some code label change on Client project.


Features(Admin)
Admin user has below menus
- Dashboard
- Users
- Category
- Assessments
- Questions
- Certificate Template
- Examine & Reports
- Payments
we will go through all of those.
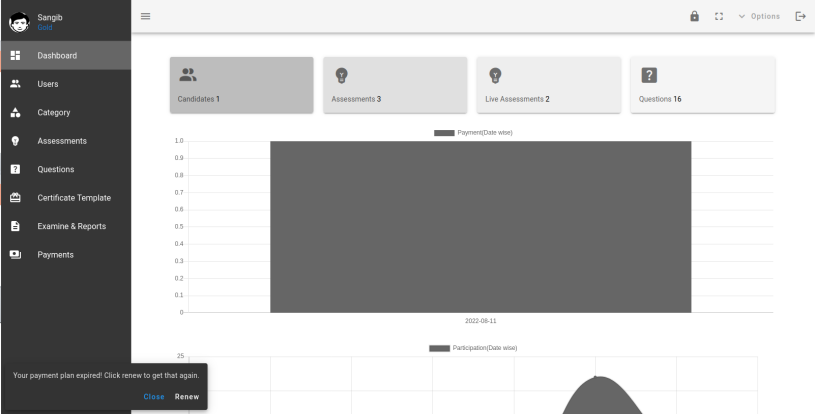
Dashboard
In Admin Dashboard, below charts are available
- Payment (Date wise)
- Participation (Date wise)
- Participation (Assessment Topic wise)
- Browsing history (Month wise)
- Browsing history (Depends on browser)
- Browsing history (Operating system wise)
- Login (Date wise)
Also in dashboard you will see a message dialog box(see below image) if your existing subscription plan is expired and you can renew your plan by using that.
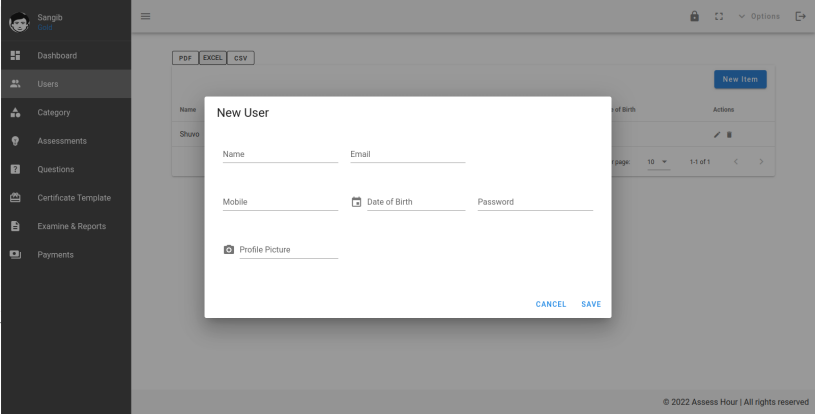
Users
As an admin you can add and manage your candidates from here.
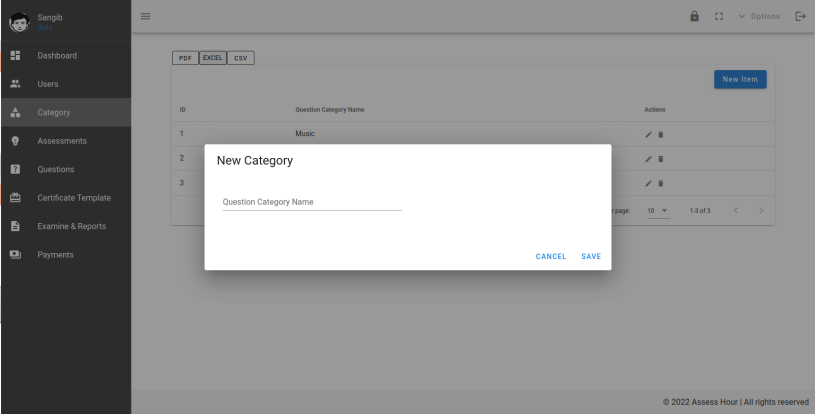
Category
All your question category will apear here and you can add & manage new categories from here.
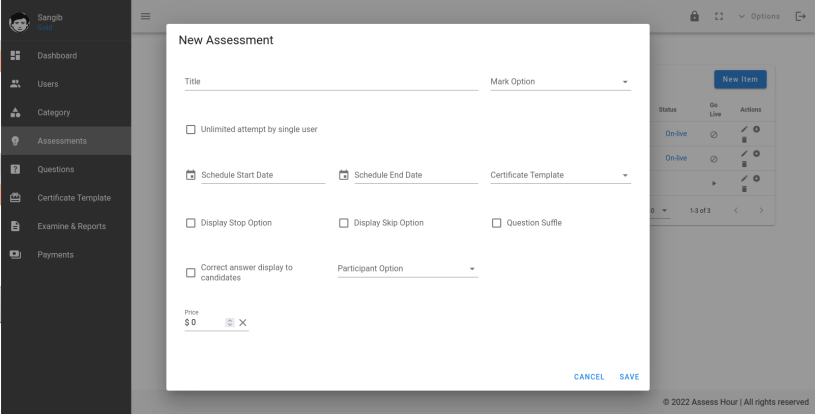
Assessments
It is the starting point of a new Assessment. You can create a new Assessment by filling below fields,
- Title (Title of your Assessment, No duplicate is accepted)
- Mark Option (Three options available i.e Equal distribution,Question wise set & No marks(survey), actually here you will define whether it is an marks based exam or an survey without marks).
- Multiple Attempt ( Check this only If you allow your students to take a quiz/exam/survey multiple times)
- Multiple Answer ( Check this if you want to set multiple answers for one question)
- Multiple Attempt ( Check this only If you allow your students to select multiple answer for one question)
- Marks (only visible for Question wise Mark Option)
- Required Time (only visible for Question wise Mark Option and must be set in minutes)
- Pass Marks (Available for Marks based assessments and one student have to pass for getting a certificate)
- Schedule Start Date ( in case of schedule a exam/quiz)
- Schedule End Date ( in case of schedule a exam/quiz)
- Certificate Template ( select one if you want to give certificate)
- Correct Answer display to candidates ( Check this if you allow correct answers to student result sheet)
- Participant Option ( All registered candidates or you may set a comma seperated email list like abc@gmail.com, xyz@hotmail.com,def@yahoo.com)
- Sent invitation to email will available if you select custom input as participant option
- Price (set price of each assessment, not mendatory)
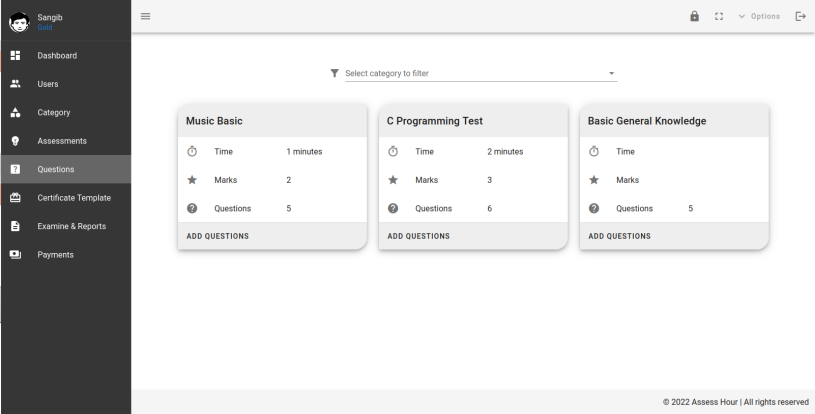
Questions
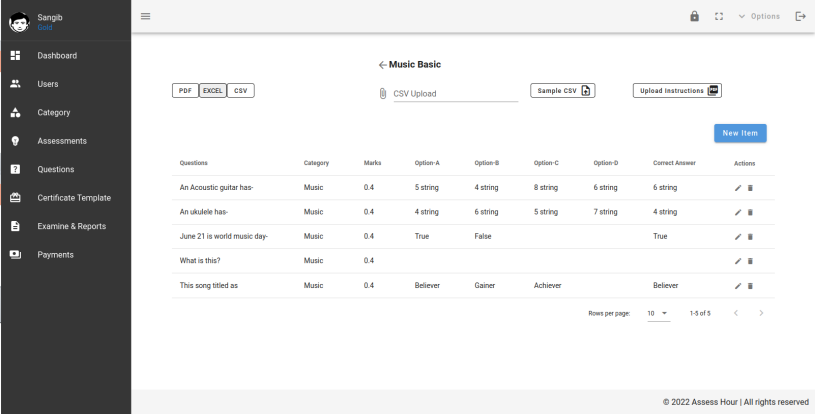
List of assessments in box shape with some other fields will be viewed here and you can add question by filling below fields
- Question ( No duplicate is accepted for a particular quiz)
- Code Snippet ( Check this only if you want set pre-formatted questions like Programming language code or anything you want keep source format)
- Question Type ( MCQ & Descriptive)
- Complexity Lavel (Easy, Medium & Hard)
- Question Category(select one category from your existing category list)
- Question Video (Only youtube embed video is allowed) (Optional)
- Question Image (Optional)
- Option-A
- Option-B
- Option-C (Optional)
- Option-D (Optional)
- Option-E (Optional)
- Correct Answer
- Answer Explanation (Optional)
(8-13) applicable for MCQ questions only.
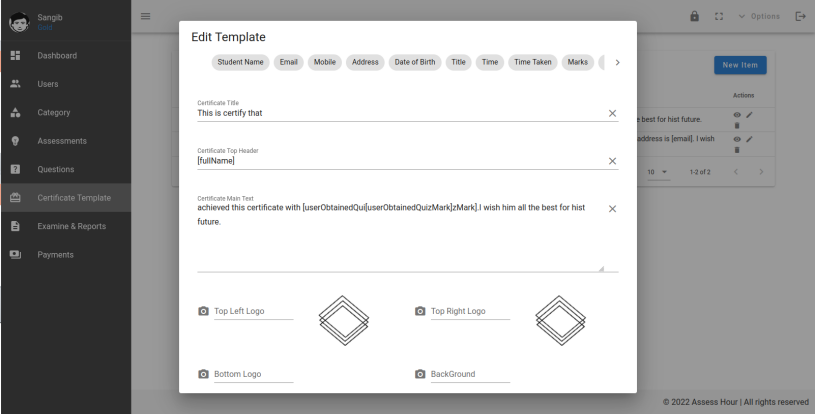
Certificate Templates
Design templates from here and allow those to recognize your candidates
Avaiable fields
- Certificate Title
- Certificate Top Header
- Certificate Main Text
- Top Left Logo (Optional)
- Top Right Logo (Optional)
- Bottom Logo (Optional)
- Background Image (Optional)
- Signature Left Image (Optional)
- Signature Left Text (Optional)
- Signature Right Image (Optional)
- Signature Right Text (Optional)
- Publish Date (Optional)
There is a list (Student Name, Mobile, Address, Title etc.) on top of all fields. You can drag them and drop on any of the text fields as per your need.
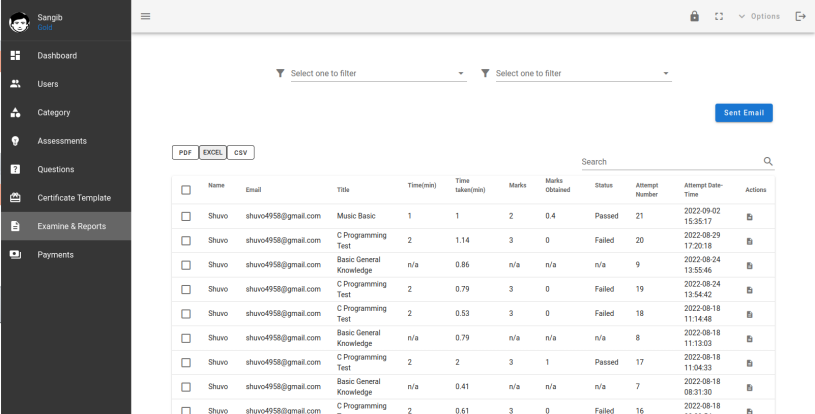
Examine & Reports
All your candidates exam records will find here and examine options will visible for descriptive questions assessments. You can filter those and can download those on PDF,CSV & Excel. Also here you find a Sent Email button, use that if you want to sent email to your selected candidates.
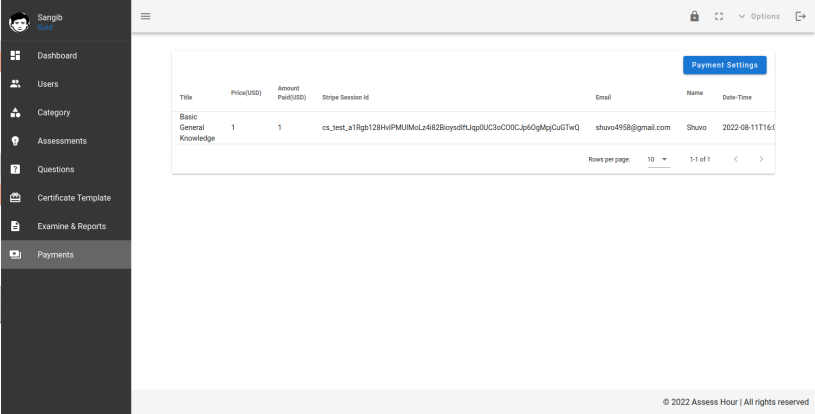
Payments
Here you can see all payments data of your paid assessments. Also you need to set your Stripe secret key to accept payments for paid assessment by clicking Payment Settings button on top right corner.
Features(Candidates)
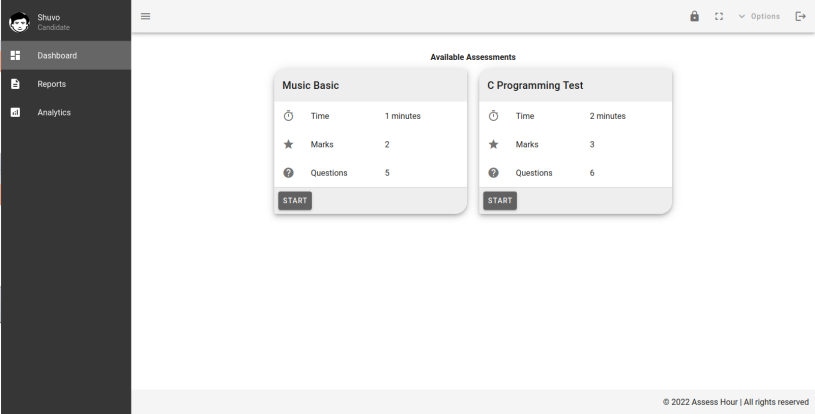
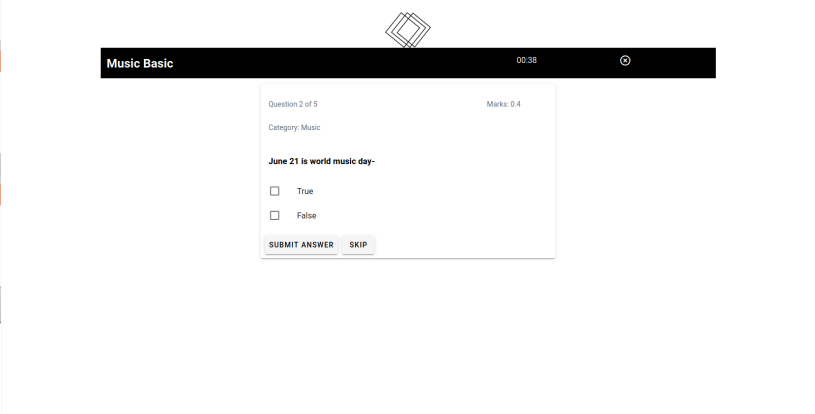
Dashboard
On candidate dashboard, you can see all your available assessments and can start by clicking the start button.
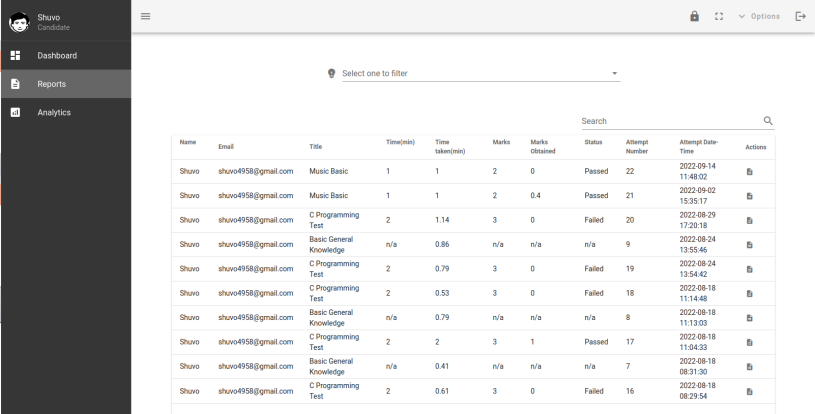
Reports
Here as a candidate you will find your all attempted assessments results in detail.
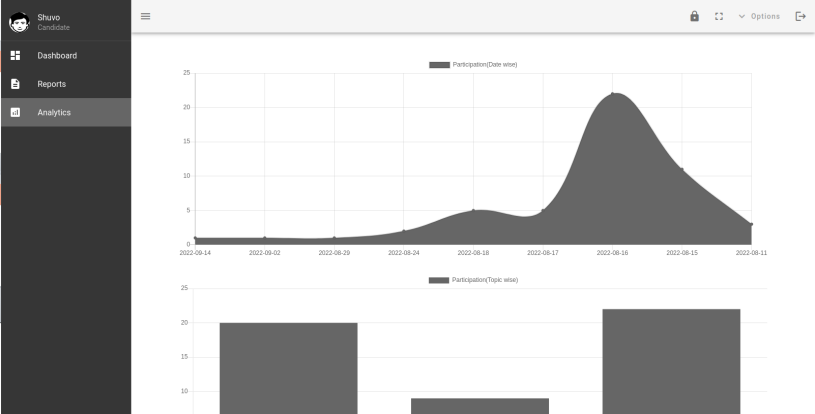
Analytics
Some data analysis here based on your login, exam attempt, data usage and others.
Conclusion
Once again, thank you so much for purchasing this script. As I said at the beginning, I'd be glad to help you if you have any questions relating to this script. I'll do my best to assist. If you have a more general question relating to this script you may also comment directly on product comment section.
Sangib Kumar Saha